OverviewThe Invoice feature lets users:
|
TABLE OF CONTENTS
- Invoice Inbox vs. Manual Creation
- Uploading an Invoice
- Splitting a Multi-Invoice PDF
- Reviewing Invoice Details
- Matching Items
- Understanding the Invoice Status Icons
- Approving Invoices
- Viewing and Exporting Invoices
- Invoice Inbox
How to Use Create Invoice
Invoice Inbox vs. Manual Creation
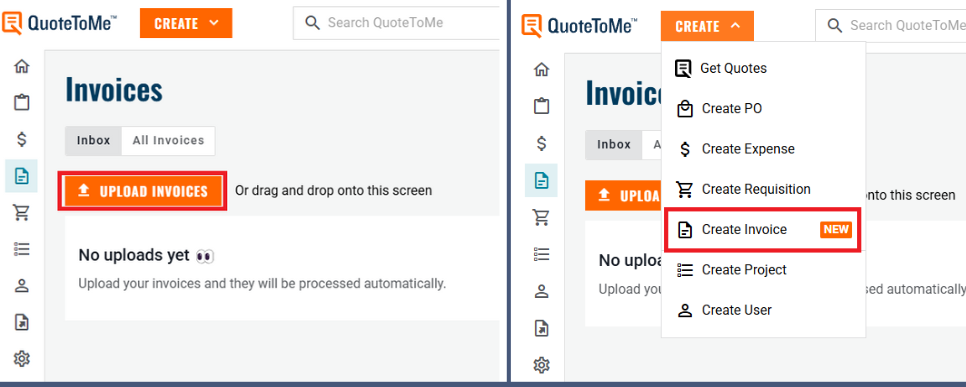
Invoice Inbox: Upload one or many (bulk) invoices. The system scans and extracts details automatically. Enter some details manually when ready.
- Optional: vendors can send invoices to an email set up by QTM staff to appear in the invoice inbox. Please contact support to enable this.
- Emails can contain PDF and Excel files, only PDFs scan into QTM automatically.
Manual Creation: Scan & extract details on a single invoice, enter some details manually to complete.
Uploading an Invoice
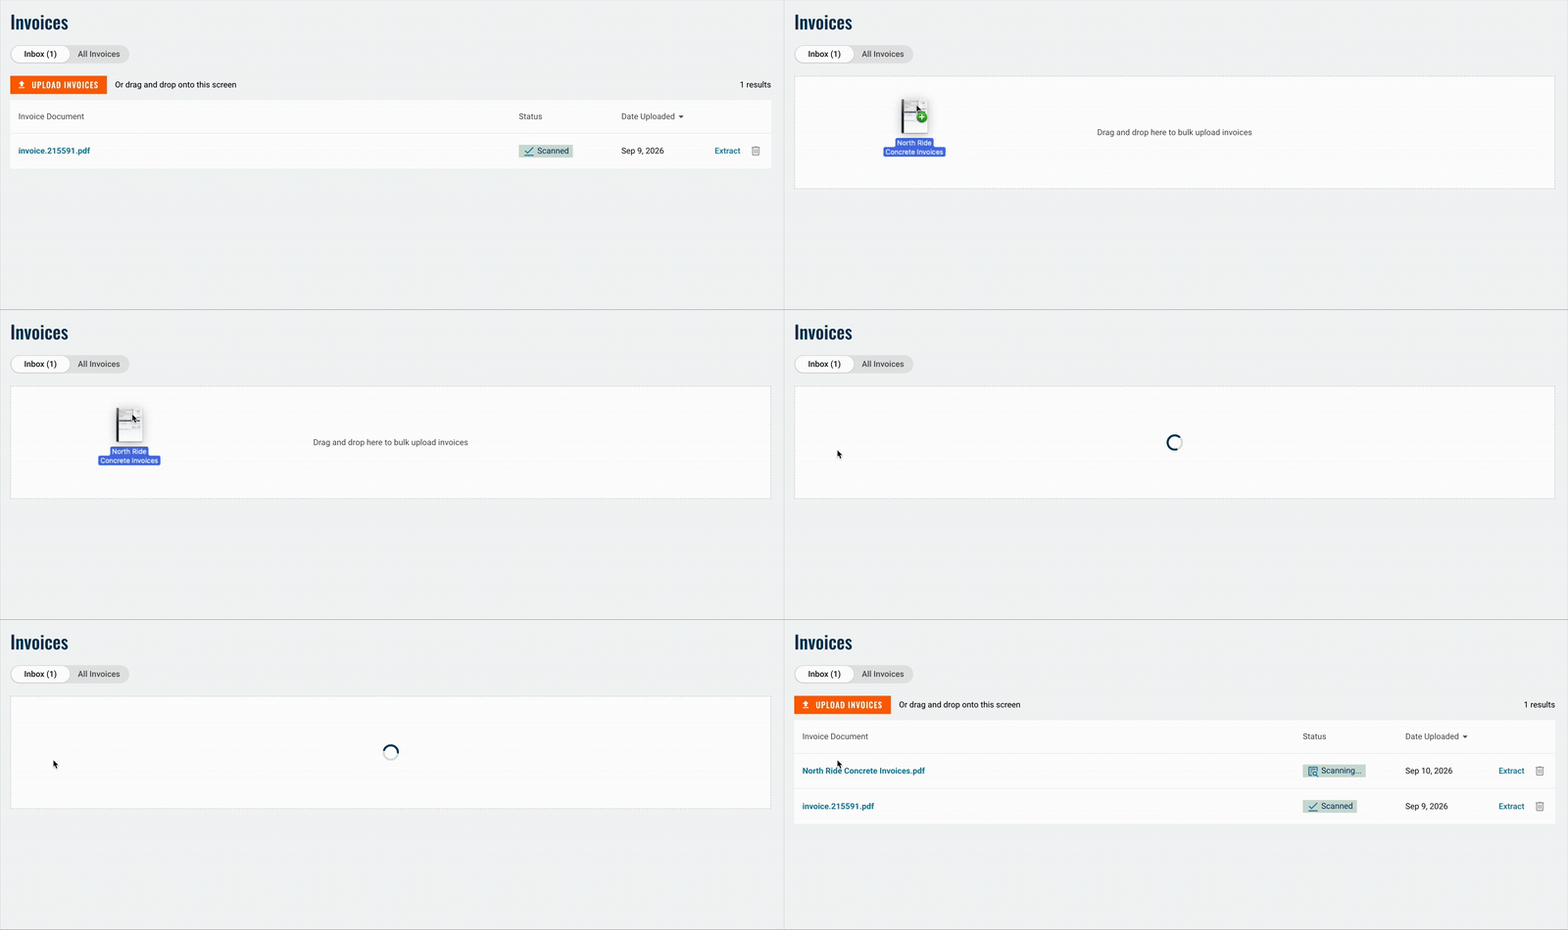
- Upload or use drag and drop to upload the invoice file to the inbox.
- The system scans for a PO number and links it automatically if found.
- Extracted data appears in the invoice approval form.
Splitting a Multi-Invoice PDF
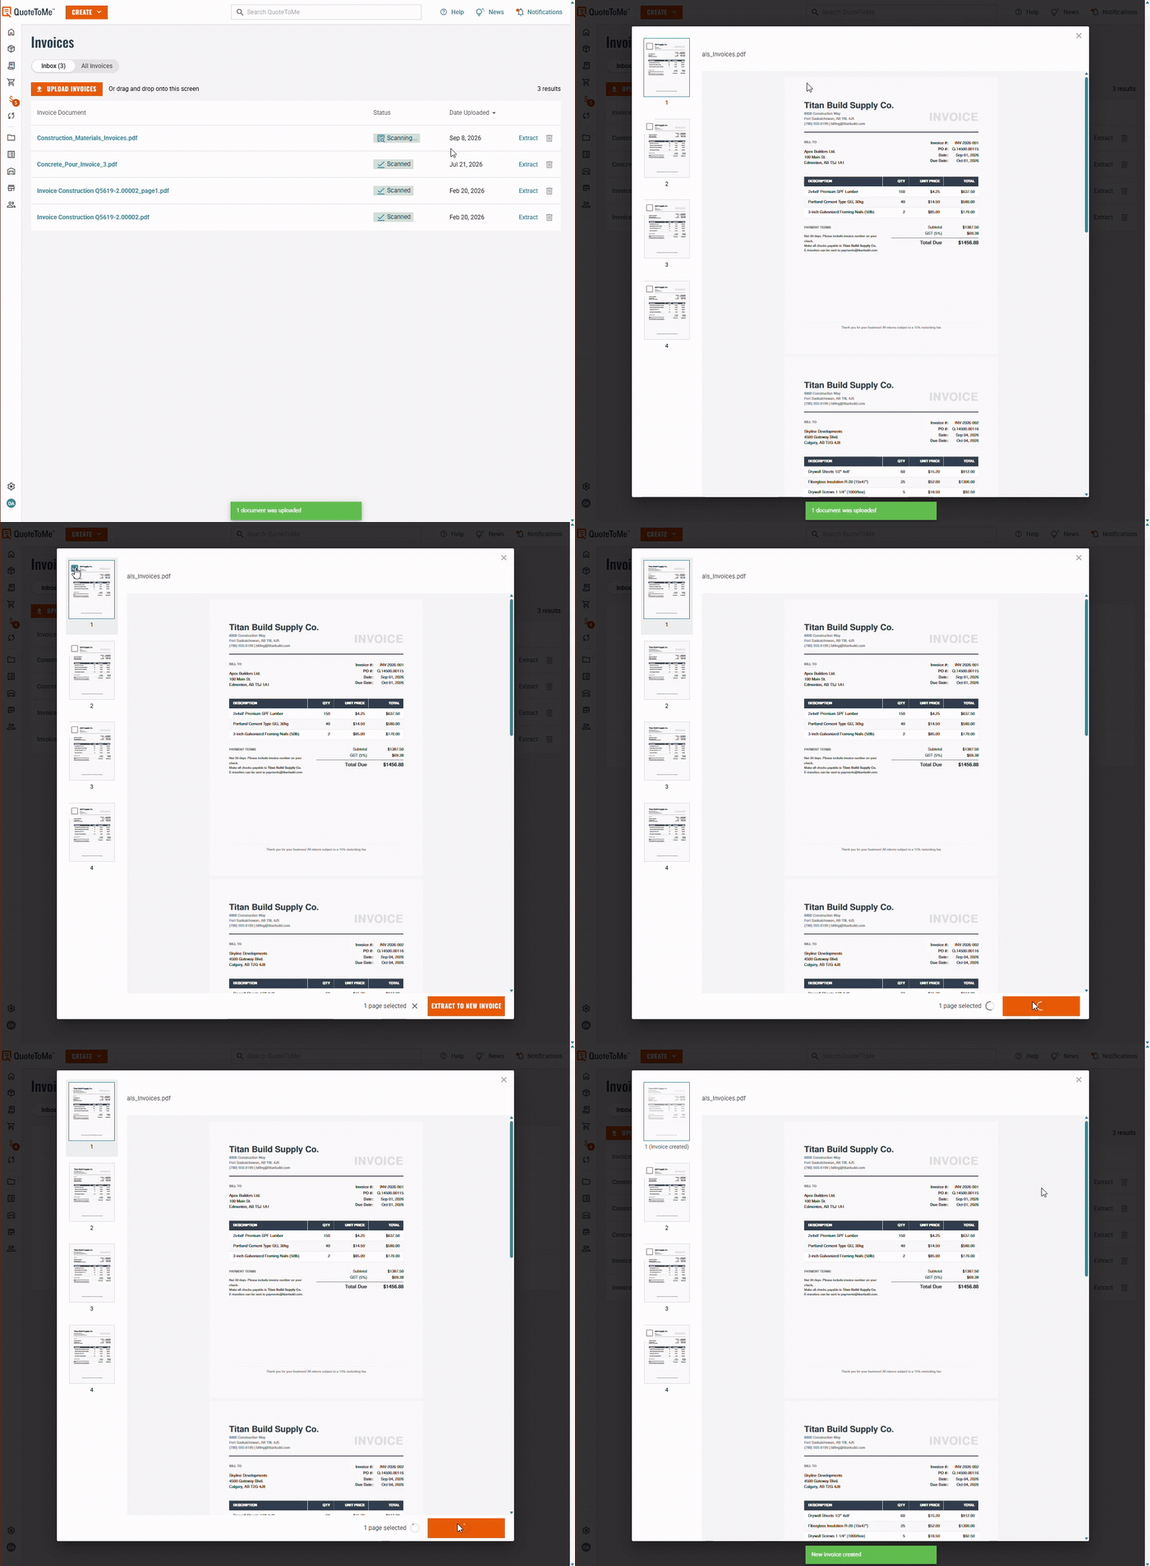
Some suppliers send multiple invoices in one PDF file. Use Extract to separate each to it's own invoice:
- Click Extract next to the file in the Inbox to open the scanned document.
- Select the page(s) that belong to one invoice, then click Extract To New Invoice.
- Repeat for each remaining invoice in the file.
- Each extracted invoice is then processed the same as a single-invoice upload.
- Note: the original invoice file is not modified when extracting invoices. The original will need to be deleted manually after extracting all invoices.
Reviewing Invoice Details
- The system alerts if an invoice number is duplicated to prevent double payments.
- Key details (PO number, invoice date, invoice number, project, supplier) are extracted.
- Manually link or unlink invoices if needed.
- Invoice line items are displayed for review.
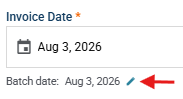
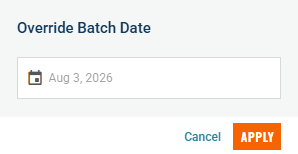
- Invoice Date note for Vista Viewpoint users: an option will appear to change the Batch Date if the invoice needs to be sent to a previous batch:
Matching Items
- The system auto-matches invoice items to PO line items.
- Adjust matches manually if needed.
- Click Save and Close, then request approval.
Understanding the Invoice Status Icons
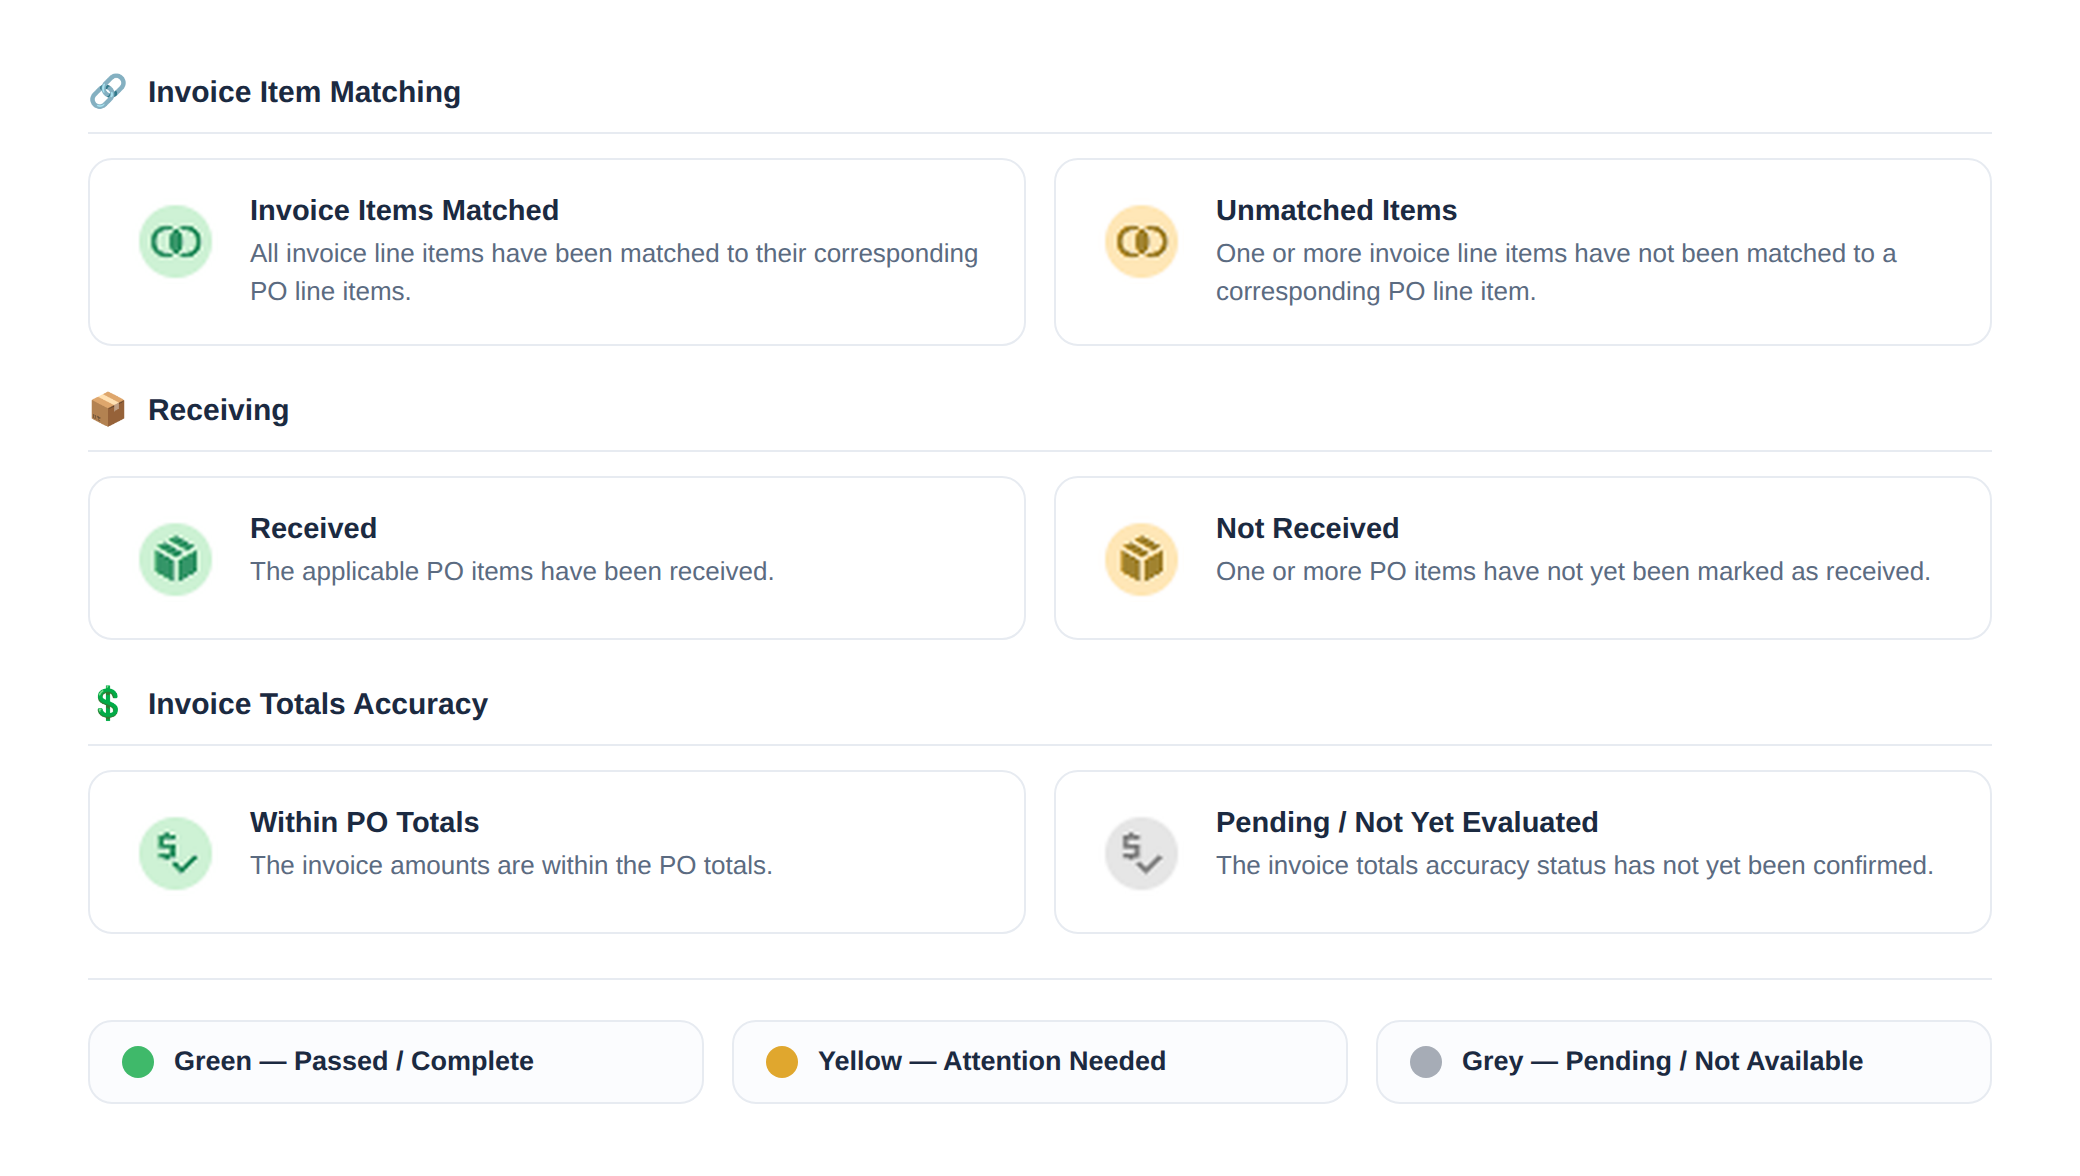
- Once an invoice is matched, QuoteToMe checks it against the PO and shows three status icons on the Invoice Items panel.
- Each icon's color tells you whether that check has passed, needs attention, or is still pending.
Color Key
- Green - Passed/Complete. The check has been passed successfully.
- Yellow - Attention Needed/ There is an item that may require action.
- Grey - Pending/Not Available. The check has not been complete or evaluated.
What to Do
- If you see a yellow icon, something is missing or needs attention — follow the on-screen guidance to resolve it.
- A yellow icon will not block sending the invoice for approval, but the underlying item should still be resolved.
- Review any items that exceed PO amounts and take the necessary action before approving.
Approving Invoices
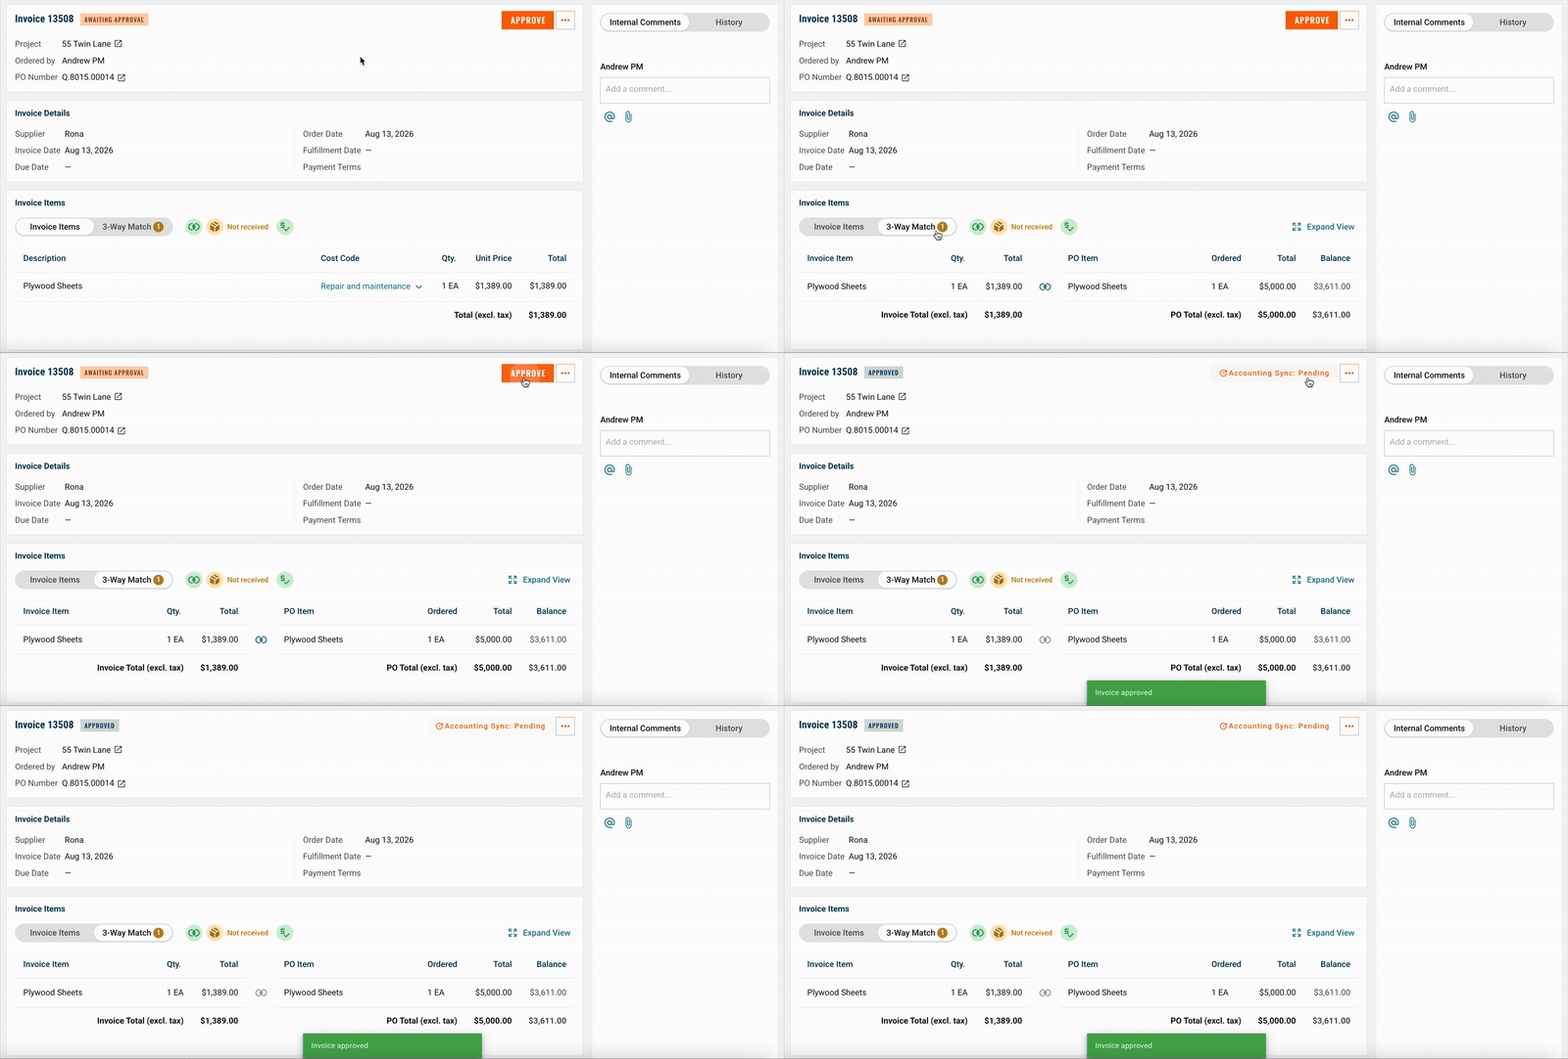
The Invoice Approval page shows:
- Invoice items tab
- Three-Way Match tab
- Attachments: the uploaded invoice file
- Internal Comments/History: a panel for internal comments and history trail
From here, approvers can:
- Review the status icons
- Switch to the 3-Way Match tab to see matching details
- Adjust matches if needed
- Approve the invoice.
Viewing and Exporting Invoices
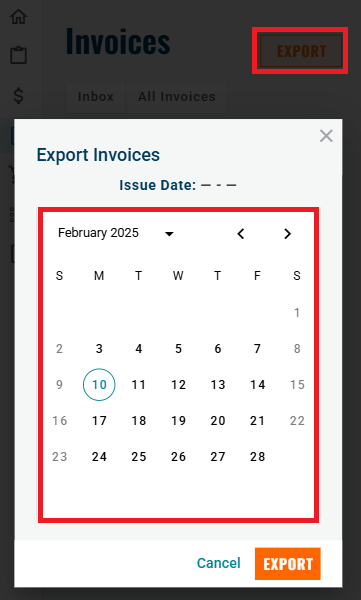
- View pending and approved invoices on the Invoice homepage.
- Select Export and choose a date range to download a CSV file.
- Users can filter and analyze the data as needed.
Invoice Inbox Setup
To check if you have an invoice email setup, view your Company Settings (Admins only):
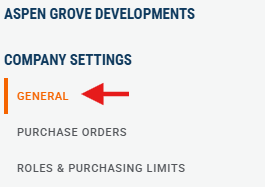
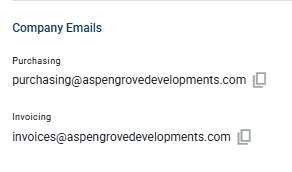
If you do not have one set up please reach out to QTM support to enable this if needed.

Need help?
Reach out to our Customer Support team:
- Call us toll-free at 1-833-712-5021
- Chat with us in our web and mobile apps